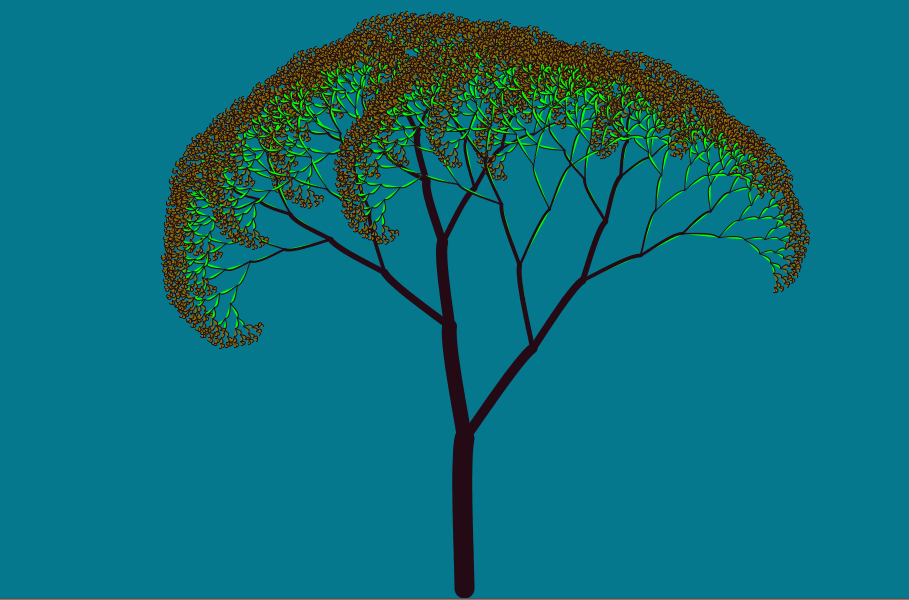
That tree is much more complex than any of the images we have drawn so far, so let’s approach this carefully. The tree consists of a trunk with two branches. Each branch has two branches, and each of those branches has two branches. Click on Figure 6.2 and watch what happens.
That’s cool, each of the branches coming off of the trunk is really just a smaller tree – each consists of a trunk with two branches. In fact, every branch in the entire tree looks like a tree itself – each branch consists of a main part with two branches and each of its two branches looks like an even smaller version of the tree. Like the stairs, this tree is said to have a recursive structure – the main structure consists of one of more smaller structures that are simple variations of the main structure.
Using this observation, let’s write a method, drawTree, to draw the tree. We will include two parameters in drawTree to indicate how big we want the trunk to be: one will be for the width and one will be for the height. Let’s call these parameter trunkWidth and trunkHeight. First, we set the width of the main trunk by calling Processing’s strokeWeight method. Once the stroke weight is set, we can draw the line representing the main trunk. Assuming the orientation of the window has previously been translated to the base of the trunk, the line will go from (0, 0) to (0, -trunkHeight) . The first two lines of our method are then:
strokeWeight(trunkWidth);
line(0,0,0,-trunkHeight);
Before we draw the branches, we translate the orientation of the window to the top of the main trunk since this is the base of the two trees representing the two branches coming off of the main trunk of the tree. This can be accomplished by calling:
translate(0,-treeHeight);
Next, we need to draw the two branches coming off of the main trunk. Each branch should have a trunk that is slightly smaller than the main trunk. Let’s say the height of the trunks for the branches is 75% of the height of the main trunk. We don’t want the tree to be perfectly symmetrical, though, so we’ll let the width of the trunk on the left branch be 75% of the width of the main trunk but let the width of the trunk on the right branch be 50% of the width of the main trunk.
We will rotate a little to the left to draw the left branch and then draw a tree that has a width that is 75% of the width of the main trunk we just drew. Remember the left branch of the tree is a the trunk of a tree itself. What we want to do, then, to draw the left branch is to draw a tree with a slightly smaller main trunk. We can describe in pseudocode what we want to do:
- rotate a little to the left
- draw a tree with a trunk width that is 75% of the main trunk width
and a trunk height that is 75% of the main trunk height.
The rotate part is easy, but how do we do the tree drawing part? Our solution is both obvious and mind boggling: we simply call the drawTree method with arguments trunkWidth * 0.75f and trunkHeight * 0.75f. In other words, we make the following two method calls to rotate to the correct angle and draw the smaller tree for the left branch:
rotate(radians(25));
drawTree(trunkWidth * 0.75, trunkHeight * 0.75);.
Notice that we pass in an argument for the trunk width that is 75% of the main trunk width and an argument for the trunk height that is 75% of the main trunk height. Each call to drawTree will have its own trunkWidth and trunkHeight parameters. This call to drawTree, then, starts with a value for its trunkWidth and trunkHeight parameters that are 75% of the value held by the trunkWidth and trunkHeight parameters in the calling method.
To draw the right branch, we rotate a little to the right and then call drawTree with the width of the trunk at 60% of the width of the main trunk and the height of the trunk at 75% of the height of the main trunk:
rotate(radians(-45));
drawTree(trunkWidth * 0.6, trunkHeight * 0.75);
The entire method is shown in Figure 6.3 along with the initial call from draw that translates the orientation to the bottom center of the window and sets the initial trunkWidth and trunkHeight to 10 and 150, respectively.
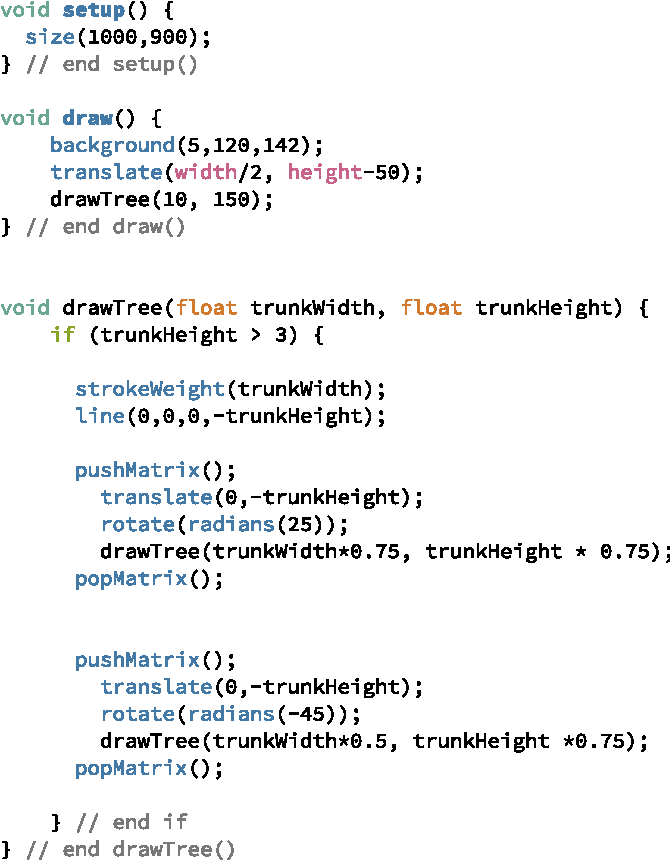
Figure 6.4 shows the tree drawn by this method.
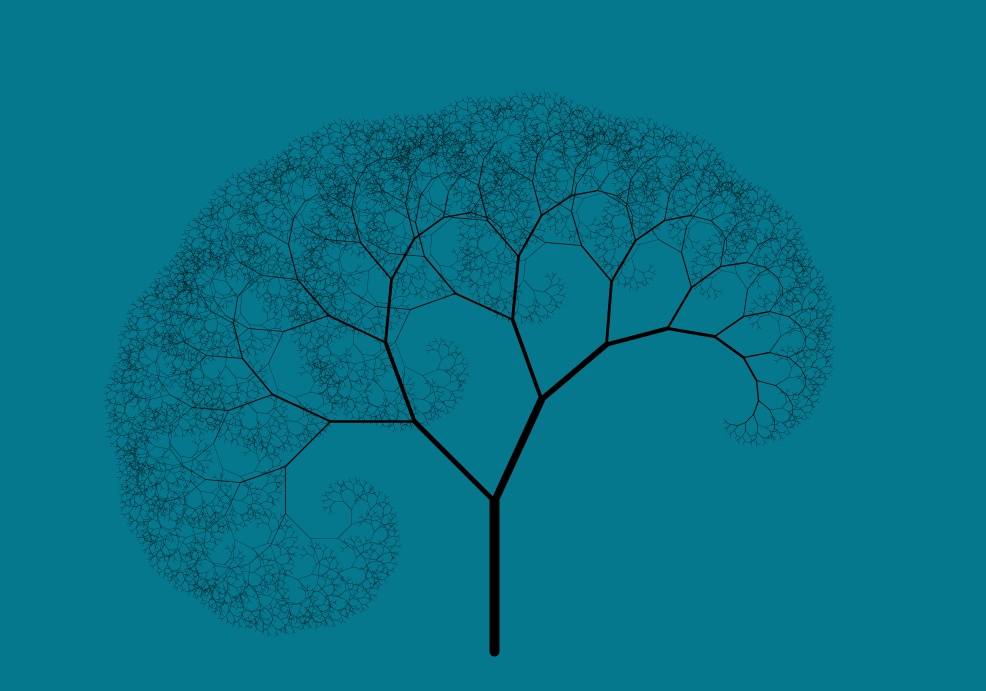
Exercise 6.1.1 The tree shown in Figure 6.4 doesn’t quite have the same quality as the tree shown in Figure 6.1. There are a couple of reasons for this. First, Figure 6.1 adds a little randomness to the choice of angles for the branches. Second, the trunks in Figure 6.1 were not drawn using lines; instead, the trunks were drawn using curves. Finally, the color was something I sort of did accidentally, using a green fill when the width of the trunk got below a certain value.
Look up the curve method in the reference on the Processing web site and read the corresponding tutorial on using curves. Update the code in Figure 6.3 to use both randomness and curves. Experiment with different techniques until you get a tree you like.